
가드란 무엇일까??
"이 요청을 컨트롤러까지 보내도 되는지"를 판단하는 관문이다.
- true -> 다음 단계로 이동
- false -> 요청 차단
가드를 보다 보면 이런 생각이 들 수 있다. “이거 파이프랑 비슷한 역할 아닌가? 굳이 따로 있어야 하나?” 하지만 파이프와 가드는 목적 자체가 다르다. 파이프는 요청 데이터의 검증과 변환에 집중한다. 반면 가드는 이 요청이 실행될 자격이 있는지, 즉 접근 가능 여부를 판단한다. 쉽게 말해, 파이프는 데이터를 다루는 도구이고 가드는 요청을 통과시킬지 결정하는 문이다.
가드는 모든 미들웨어 이후에 실행되지만, 인터셉터나 파이프 이전에 실행된다.
Request
  ↓
Middleware
  ↓
Guard        ← 현재 위치 // 여기서 true면 다음 스텝으로 넘기고 false인 경우에 403/403 반환
  ↓
Interceptor (Before)
  ↓
Pipe
  ↓
Controller
Guard 기본구조
import { CanActivate, ExecutionContext, Injectable } from '@nestjs/common';
import { Observable } from 'rxjs';

@Injectable()
export class AuthGuard implements CanActivate {
  canActivate(
    context: ExecutionContext,
  ): boolean | Promise<boolean> | Observable<boolean> {
    return true;
  }
}
여기서 핵심 포인트는 3가지이다.
- CanActivate 인터페이스 구현
- ExecutionContext로 요청 정보 접근하기
- boolean 또는 Promise<boolean> 리턴
간단한 테스트 01 - 로그인 된 사용자인가?
// auth/authConroller.ts
import { Controller, Get, Req } from '@nestjs/common';

@Controller('auth')
export class AuthController {
  @Get('logined')
  isLogined(@Req() request: Request) {
    console.log(request.headers['token']);
    return 'sdfsdf';
  }
}
자 간단하게 헤더에서 token을 받아와서 확인을 시켜보는 코드이다. 간단하게 포스트맨 같은 도구를 이용하여 임의의 헤더값을 넣은 후 전송 해보는 과정을 직접 해보자.


token = iam_ok 가 출력이 되는걸 확인할 수 있다. 자 이제 가드를 통해서 출입문에 통과할 수 있을지 없을지 확인을 해보자.
// auth/auth.guard.ts
import { CanActivate, ExecutionContext, Injectable } from '@nestjs/common';
import { Observable } from 'rxjs';

@Injectable()
export class AuthGuard implements CanActivate {
  canActivate(
    context: ExecutionContext,
  ): boolean | Promise<boolean> | Observable<boolean> {
    const req = context.switchToHttp().getRequest();

    const result: boolean = req.headers['token'] === 'iam_ok' ? true : false;
    return result;
  }
}// AuthGuard 위와 같이 수정 후 컨트롤러에 UseGuards(AuthGuard)로 설정
token을 안넣어주니까 403 에러를 반환하였다.
위에 주석코드에 있지만 컨트롤러에 UseGuards로 AuthGuard()를 적어주어야한다.
컨트롤러가 아닌 전역으로 할 경우에는 main.ts에 app.useGlobalGuards()
간단한 테스트 02 - 역할 기반 제어
사실 위의 테스트는 간단한 장난이다. 단순하게 Guard가 어떠한 기능을 하는지 어떠한 흐름인지 확인 정도만 해본것이고, 이제 실제로 쓸만한 해당하는 역할에 관련하여 출입이 가능하게 한번 테스트를 해 볼 것이다. 각 핸들러는 경로마다 다른 권한 체계를 가질 수 있는데, 어떤 경로는 관리자만 이용할 수 있고, 어떤 경로는 누구나 이용할 수 있을 것이다. 어떻게 하면 유연하고 재사용 가능한 방식으로 역할과 경로를 연결할 수 있을지 테스트 해보자.
// auth/roles.decorator.ts
import { Reflector } from '@nestjs/core';

export const Roles = Reflector.createDecorator<string[]>();
auth/roles.decorator.ts 하나 만들어보자. 그리고 상단의 코드로 셋팅하고 하단의 테스트 코드를 추가해주었다.
import { Controller, Get, Req, UseGuards } from '@nestjs/common';
import { AuthGuard } from './auth.guard';
import { Roles } from './roles.decorator';

@UseGuards(AuthGuard)
@Controller('auth')
export class AuthController {
  @Get('admin')
  @Roles(['admin'])
  rolesCheck() {
    return { roles: 'admin' };
  }

  @Get('user')
  anyCheck() {
    return { roles: 'user' };
  }
}
이렇게 데코레이터와 컨트롤러가 셋팅이 되었으면 마지막으로 가드를 수정하면 된다. 가드에서 경로의 역할(사용자 지정 메타데이터)에 접근하기 위해 Reflector헬퍼 클래스를 사용한다.
//auth.guard.ts에 이 코드를 추가하고 한번 확인해본다.
const roles = this.reflector.get(Roles, context.getHandler());
console.log(roles);
//역할관련 셋팅 없으면 누구나 접속 가능 -> true
if (!roles) {
return true;
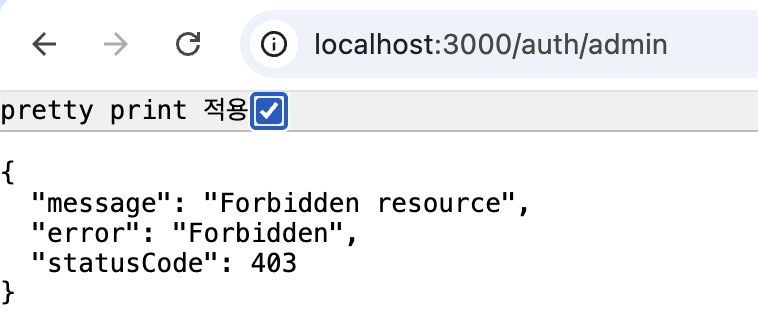
}admin으로 접속 시

user로 접속 시

user로는 들어가면 잘 접속이 되지만 admin 페이지로 들어가면 연결이 안되는걸 확인할 수 있다.
이제 마지막으로 현재 내가 셋팅해둔 역할과 request가 들어왔을때 토큰의 레벨이 같아야지 접속이 가능하게끔 코드를 수정해보자.
import { CanActivate, ExecutionContext, Injectable } from '@nestjs/common';
import { Reflector } from '@nestjs/core';
import { Observable } from 'rxjs';
import { Roles } from './roles.decorator';

@Injectable()
export class AuthGuard implements CanActivate {
  constructor(private reflector: Reflector) {}
  canActivate(
    context: ExecutionContext,
  ): boolean | Promise<boolean> | Observable<boolean> {
    const roles = this.reflector.get(Roles, context.getHandler());
    console.log(roles);

    if (!roles) {
      return true;
    }
    const req = context.switchToHttp().getRequest();

    const result: boolean = matchRoles(roles, req.headers['token']);

    return result;
  }
}

function matchRoles(rolesArr: string[], tokenLevel: string) {
  return rolesArr.some((role) => rolesArr.includes(tokenLevel));
}


참고
https://docs.nestjs.com/guards
Documentation | NestJS - A progressive Node.js framework
Nest is a framework for building efficient, scalable Node.js server-side applications. It uses progressive JavaScript, is built with TypeScript and combines elements of OOP (Object Oriented Programming), FP (Functional Programming), and FRP (Functional Rea
docs.nestjs.com
https://docs.nestjs.com/fundamentals/execution-context#reflection-and-metadata
Documentation | NestJS - A progressive Node.js framework
Nest is a framework for building efficient, scalable Node.js server-side applications. It uses progressive JavaScript, is built with TypeScript and combines elements of OOP (Object Oriented Programming), FP (Functional Programming), and FRP (Functional Rea
docs.nestjs.com
https://www.daleseo.com/nestjs-guards
가드(Guard)로 NestJS 앱 안전하게 지키기
Engineering Blog by Dale Seo
www.daleseo.com
'NestJS > 개념과 구조 정리' 카테고리의 다른 글
| NestJS로 효율적인 백엔드 개발하기 (10) - 인터셉터 (0) | 2025.12.15 |
|---|---|
| NestJS로 효율적인 백엔드 개발하기 (08) - 파이프 (3) | 2025.12.13 |
| NestJS로 효율적인 백엔드 개발하기 (07) - 예외 필터 (0) | 2025.12.12 |
| NestJS로 효율적인 백엔드 개발하기 (06) - 미들웨어(클래스형, 함수형) (0) | 2025.12.12 |
| NestJS로 효율적인 백엔드 개발하기 (05) - 모듈에 대해 알아보자 (0) | 2025.12.12 |